3:57 م
 Unknown


Humidity
Definition
§ Humidity
is
a term used
to describe the
presence of moisture
or water vapor
in the air .
The amount of
moisture that the
air will hold
depends upon the
temperature of the
air . Warm air
will hold more
moisture than cold
air. Dry air
causes rapid evaporation
. Moist ( humid )
air prevents rapid
evaporation making it
feel warmer than
the temperature indicated
by thermometer .
§ Relative humidity is defined
as the actual
vapor pressure on
the value that
would occur in the
space was occupied
by steam in
saturation conditions and
expressed in %

§ Absolute
humidity is the weight of water vapor in a given volume of atmosphere
(air) and is expressed in kg of water vapor per cubic of dry air .

Effect
Of Humidity On The Greenhouse Climate
Humidity is one of the
environmental factors that must be in proper balance for satisfactory
greenhouse cultivation .
Plants have to
transpirate water to transport nutrients , to cool and to regulate
growth .
The transpiration depends on the saturation deficit between the
Stomata’s and the air .
Problem definition:
The
following can be said :
*Too
high and low saturation deficits have unfavourable influence on plant ;
physiology and growth :
- When air humidity is too high ,the gas exchanges are restrained causing low transpiration of the plant and therefore low nutrient absorption.
- When air humidity is too low ,the stomates close, reducing photosynthesis rate .
* High
humidity can also induce difficulties in
pollination because wet pollen cannot be released .
* The humidity of the air in
the plant favours diseases.
Solving
of the problem:
By designing greenhouse
control system we can control some parameters which have agreat effect on
plants grow and one of the most
effective factors on plants is humidity.
Controlling of humidity
can be realized by using humidity sensor which provides accurate measures of
relative humidity according to this measures we can control the humidity and
generating the right action that leads to maxmimum product of plant.
humidity sensor that we used in our system is
HS1101Relative Humidity Sensor

Why HS1101 Relative Humidity
Sensor?
Features
Ø
Simple calibration required when
operating in standard conditions.
Ø
Fast response time.
Ø
Simple, RCTIME output corresponds
to relative humidity when directly
connected to BASIC Stamp.
Ø
Compatible with automatized
assembly processes , including wave
soldering , reflow and water immersion.
Ø
Suitable for linear voltage or
frequency output circuitry.
Ø
High reliability and long term
stability.
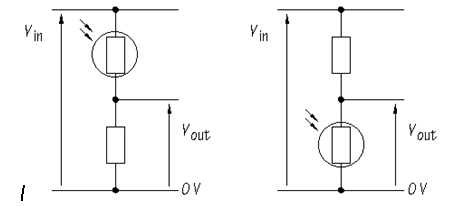
Circuit & equation:
Connecting and
Testing
Connecting the HS1101 to a
microcontroller is demonstrated here with a BASIC Stamp module. It is a
straightforward application, requiring only one I/O pin.
Since the HS
1101 is based on a unique capacitive cell, relative humidity can be obtained
using a simple RC wiring diagram,

TDecay = 2.4 %RH +
Rhconstant
Key
Specifications
Ø
Power requirements: 5 to 10 VDC.
Ø
Communication: Analog output of
varying capacitance in response to change in relative humidity.
Ø
Humidity Measuring Range:
1 to 99% RH
Ø
Operating temperature: -40 to 212
°F (-40 to 100 °C)
Application
Ideas
Ø
Home and office automation
Ø
Humidity component for weather
station applications
Ø
Industrial process control
systems
The block diagram of
the humidity circuit is as the following: